
Manage all your pentest tools in one place and keep them up to date with one command.
Why
I was looking for a way to manage and keep up to date some tools that are not included in Kali-Linux. For example, I was looking for an easy way to manage privilege escalation scripts. One day I saw sec-tools from eugenekolo (which you can see at the bottom of the page) and it gave me the motivation to start working on mine right away.
But keep in mind that is different. I built this for people that are working with Kali. Should work on other distro but I didn’t include tool like Burp Suite or SQLmap because it comes in Kali by default.
Installation
$ git clone https://github.com/som3canadian/Some-Tools
$ cd Some-Tools
$ ./sometools.sh setup
# after setup, open new terminal or tab
$ ./sometools.sh list
# you can look in your .zshrc or .bashrc if you are not sure that the installation worked.
# For more info see Actions Detailed section.
Actions Summary
setup– Set up the environment (Create bin dir and set bin dir to your $PATH)help– Show this menuinfo– Show README.md of an installed toollist– List all tools (Installed tools will appear in a different color)list-cat– List all tools of a Category (Installed tools will appear in a different color)list-installed– List all installed toolslist-bin– List installed tools accessible from anywhere on your machineinstall– Install a toolinstall-cat– Install all tools of a Categoryinstall-all– Install all toolscheck-update– Check Update for an installed tools and Update it if you want.check-update-all– Check Update for all installed toolsself-update– Check Update for Some-Tools and Update if you wantadd-tool– Create template for a new tool (./sometools.sh add-tool newtoolname category)uninstall– Uninstall a tool (Trying uninstall with the tool built-in uninstall.sh before Cleaning from our project)uninstall-cat– Uninstall all tools of a Categorycomplete-uninstall– Delete all installed tools, remove bin directory and delete our modification in .zshrc or .bashrc
Basic usage
# Inital setup. Should be the first command
$ ./sometools.sh setup
# List all available tools
$ ./sometools.sh list
# List all available tools of a category
$ ./sometools.sh list-cat
# List install tool(s)
$ ./sometools.sh list-installed
# List installed tools accessible from anywhere on your machine
$ ./sometool.sh list-bin
# Install a tool
$ ./sometools.sh install unicorn
# Using ID instead of tool name
$ ./sometools.sh install 4
# Install all tools of a Category
$ ./sometools.sh install-cat PrivEsc-Win
# Install All tools
$ ./sometools.sh install all
# Show README.md of an installed tool
$ ./sometools.sh info unicorn
# Using ID instead of tool name
$ ./sometools.sh info 4
# Check for update
$ ./sometools.sh check-update PEAS
# Using ID instead of tool name
$ ./sometools.sh check-update 9
# Check update for all installed tools
# check-update all command is the main reason why I made this
$ ./sometools.sh check-update all
# Add a new tool
$ ./sometools.sh add-tool newtoolname PrivEsc-Lin
# Uninstall a tool
$ ./sometools.sh uninstall unicorn
# Using ID instead of tool name
$ ./sometools.sh uninstall 4
# Unistall all tools of a Category
$ ./sometools.sh uninstall-cat PrivEsc-Win
# Update some-tools
$ ./sometools.sh self-update
# Delete all installed tools, remove bin directory and delete our modification in .zshrc or .bashrc
$ ./sometools.sh complete-uninstall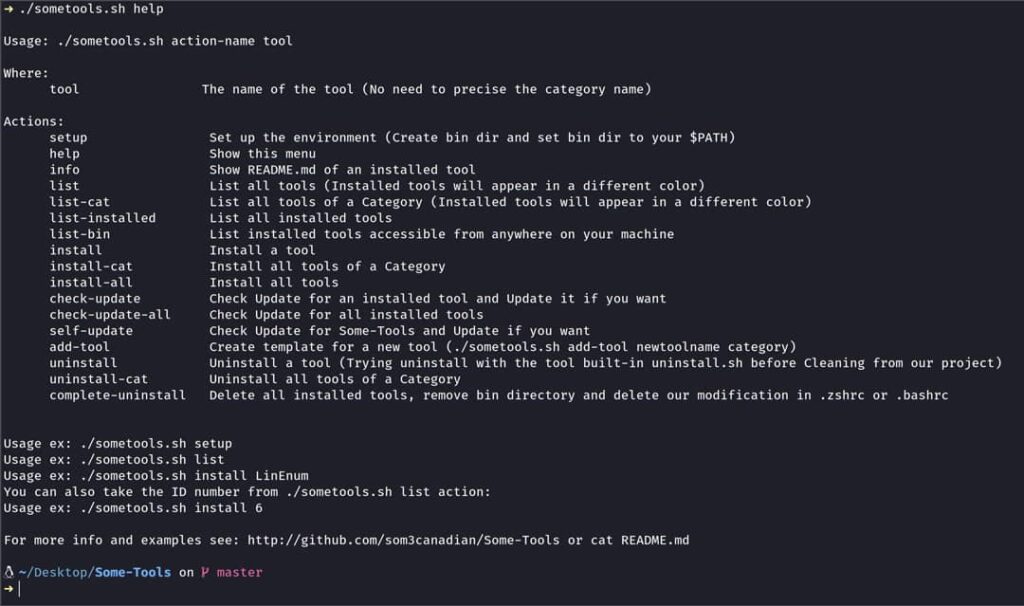
The Bin directory
- The bin directory will be created when doing the setup action. This will be the dir path that we will add to our shell $PATH (
your/install/dir/Some-Tools/bin). In the bin dir we will put copy(symlink) of tool(s) that we want executable everywhere on our machine.For example a tool likeunicorn.py, you may want to executeunicornfrom everywhere you want. - The setup action will aslo create
bin/PrivEsc-Linandbin/PrivEsc-Winin the process. In this directory we will keep our privilege escalation scripts. So, when you want to use your tools, you can fire a python http server and quickly upload the scripts you desire. The scripts in those folders will be update at the same time you update the tool(s) with check-update action.
Zsh Functions
- Zsh functions does not contain any pentest tools, it contains little script that help my workflow a lot and I thought it would be useful to others too.
- Maybe it could be use with other shell but I use it with zsh.
- This won’t be set during the setup process. You have to set it manually. How ? By adding the snippet below to your
.zshrcfile.
# Custom functions dir
# make sure to modify the path below to fit your need
fpath=(~/path/of/sometools/Zsh-Functions $fpath);
autoload -U $fpath[1]/*(.:t)- mkcd: mkdir and cd
- mv: move a file/folder into your current directory (with one argument)
- op: open file or folder in file manager (
op .to open current directory)
Tools List
Summary
$ ./sometools.sh list

# In order, columns are: ID, category name and tool name
[1] Evasion/Bashfuscator
[2] Evasion/PyFuscation
[3] Evasion/tvasion
[4] Evasion/unicorn
[5] Exploit-Win/windows-kernel-exploits
[6] PrivEsc-Lin/BeRoot
[7] PrivEsc-Lin/LinEnum
[8] PrivEsc-Lin/LinPwn
[9] PrivEsc-Lin/PEAS
[10] PrivEsc-Lin/SUID3NUM
[11] PrivEsc-Lin/SetUID
[12] PrivEsc-Lin/linux-enum-mod
[13] PrivEsc-Lin/linux-exploit-suggester
[14] PrivEsc-Lin/linux-exploit-suggester-2
[15] PrivEsc-Lin/linuxprivchecker
[16] PrivEsc-Lin/lse
[17] PrivEsc-Lin/pspy
[18] PrivEsc-Lin/setuid-wrapper
[19] PrivEsc-Lin/unix-privesc-check
[20] PrivEsc-Win/JAWS
[21] PrivEsc-Win/Powerless
[22] PrivEsc-Win/Privesc
[23] PrivEsc-Win/SessionGopher
[24] PrivEsc-Win/Sherlock
[25] PrivEsc-Win/WinPwn
[26] PrivEsc-Win/Windows-Exploit-Suggester
[27] PrivEsc-Win/Windows-Privilege-Escalation
[28] PrivEsc-Win/mimikatz
[29] PrivEsc-Win/windows-privesc-check
[30] Utilities/SirepRAT
[31] Utilities/Windows-Tools
[32] Utilities/chisel
[33] Utilities/cryptz
[34] Utilities/decodify
[35] Utilities/evil-winrm
[36] Utilities/impacket
[37] Utilities/nishang
[38] Utilities/nmapAutomator
[39] Utilities/pypykatz
[40] Utilities/revshellgen
[41] Web/dirsearch
[42] Web/kadimus
[43] Web/windows-php-reverse-shell
[44] Web/wwwolf-php-webshell
[45] WordPress/malicious-wordpress-plugin
[46] WordPress/wordpress-exploit-framework
Detailed
| ereCategory | Tool | Source |
|---|---|---|
| Evasion | Bashfuscator | here |
| Evasion | PyFuscation | here |
| Evasion | tvasion | here |
| Evasion | unicorn | here |
| Exploit-Win | windows-kernel-exploits | here |
| PrivEsc-Lin | BeRoot | here |
| PrivEsc-Lin | LinEnum | here |
| PrivEsc-Lin | LinPwn | here |
| PrivEsc-Lin | PEAS | here |
| PrivEsc-Lin | SUID3NUM | here |
| PrivEsc-Lin | SetUID | here |
| PrivEsc-Lin | linux-enum-mod | here |
| PrivEsc-Lin | linux-exploit-suggester | here |
| PrivEsc-Lin | linux-exploit-suggester-2 | here |
| PrivEsc-Lin | linuxprivchecker | here |
| PrivEsc-Lin | lse | here |
| PrivEsc-Lin | pspy | here |
| PrivEsc-Lin | setuid-wrapper | here |
| PrivEsc-Lin | unix-privesc-check | here |
| PrivEsc-Win | JAWS | here |
| PrivEsc-Win | Powerless | here |
| PrivEsc-Win | Privesc | here |
| PrivEsc-Win | SessionGopher | here |
| PrivEsc-Win | Sherlock | here |
| PrivEsc-Win | WinPwn | here |
| PrivEsc-Win | Windows-Privilege-Escalation | here |
| PrivEsc-Win | Windows-Exploit-Suggester | here |
| PrivEsc-Win | mimikatz | here |
| PrivEsc-Win | windows-privesc-check | here |
| Utilities | SirepRAT | here |
| Utilities | Windows-Tools | here |
| Utilities | chisel | here |
| Utilities | cryptz | here |
| Utilities | decodify | here |
| Utilities | evil-winrm | here |
| Utilities | impacket | here |
| Utilities | nishang | here |
| Utilities | nmapAutomator | here |
| Utilities | pypykatz | here |
| Utilities | revshellgen | here |
| Web | dirsearch | here |
| Web | Kadimus | here |
| Web | windows-php-reverse-shell | here |
| Web | wwwolf-php-webshell | here |
| WordPress | malicious-wordpress-plugin | here |
| WordPress | wordpress-exploit-framework | here |
Note:
- PEAS include both linPEAS and winPEAS scripts
- BeRoot include both Linux and Windows scripts
Actions Detailed
setup (Setup Process):
- Should be the first command you run.
- First it will ask if you use
.bashrcor.zshrc(built in setup action will not work if you are not using one of the two shell) - After that we will setup $SOME_ROOT variable et create a new $PATH
- After the setup, You can open new terminal tabs/windows or source your shell (.bashrc or .zshrc) in the current terminal to activate the new path. To see you new path after you can do
echo $PATH - In you shell file (.bashrc or .zshrc), we will copy you $PATH before we make modification. It will be commented few lines before the end of your shell file. So if you want to reset your path to before Some-Tools setup you can copy the command commented in you shell file, cleanup what we created in the file and finally source it.
- Creation of Bin directory. (bin, bin/PrivEsc-Lin and bin/PrivEsc-Win)
- You can read the setup section in
sometools.shto have a better understanding.
$ ./sometools.sh setup
install and install-all:
- Install one tool or all tools.
- If you install only one tool, instead of using tool name, you can use is ID number showed when you do
./sometools.sh list. - When you will install a tool, it will create a
.installedfile in the tool dir. This file will help us with our list-installed action.
$ ./sometools.sh list # see which tool can be install
# install a tool
$ ./sometools.sh install LinEnum
# example using an ID number
$ ./sometools.sh install 7
# installing all tools
$ ./sometools.sh install-all
install-cat and uninstall-cat:
- Install all tools of a category.
- Uninstall all tools of a category.
# install cat
$ ./sometools.sh install-cat PrivEsc-Win
# uninstall cat
$ ./sometools.sh uninstall-cat PrivEsc-Win
check-update and check-update-all:
- Check update for an installed tool or all installed tools
- check-update works for tools coming from a git repo. If you add a new tools that is not a git repo(
.gitdir), you can make anupdate-tool.shfile with your specials instructions (file must be nameupdate-tool.sh). - If you check-update only one tool, instead of using tool name, you can use is ID number showed when you do
./sometools.sh list.
$ ./sometools.sh list-installed # list currently installed tool(s)
$ ./sometools.sh check-update LinEnum
# example using an ID number
$ ./sometools.sh check-update 7
# example with check-update-all
$ ./sometools.sh check-update-all
Why two check-git ? check-git.sh only tell if the tool is behind or not. If we detect a newer version, we will ask to execute check-git-action.sh.
self-update:
- That function help keeping this tool (Some-Tools) up to date. If you are behind it will ask you if you want to
pull.
$ ./sometools.sh self-upadte
uninstall:
- Uninstall an installed tool.
- Instead of using tool name, you can use is ID number showed when you do
./sometools.sh list.
$ ./sometools.sh uninstall unicorn
# example using an ID number
$ ./sometools.sh uninstall 4add-tool:
- add-tool will create your new directory in the category you have specified. It will also create 3 files in this directory:
install-tool.sh,uninstall-tool.shand.gitignore. - Looking other tools will help you understand how add yours. It’s quite easy. Its 3 files, which
add-toolaction will create for you. - When adding a tool I strongly suggest naming the tool the same of their repo. It will be more easy to use check-update action after. But if you want a different name, you can see an example with
lsetool inPrivEsc-Lindirectory. You may have to change the.gitignorefile in your tool directory. - If your tool is not a git repo, there is no worry. But you will have to modify
install-tool.shfile to fit your needs. If you do so, the check-update action will not work “out of the box” (because we won’t find any .git directory). Solution: you can create a file nameupdate-tool.sh(in the tool directory) and put your update commands in it. Thesome-tools.shscript will detect this file name when using check-update action. Don’t forget tochmod +xyour new file. .gitignorewill contain your tool name and.installed. Why ? Because we dont want to push git repo into another repo and we dont want to push.installedfile.

$ ./sometools.sh add-tool newtoolname PrivEsc-Lin
# better example ?
$ ./sometools.sh add-tool LinEnum PrivEsc-Lin
install-tool and update-tool using scrapy
Sometimes tools need to be downloaded via the releases/latest page like pspy from DominicBreuker. So to be able to always update and download the latest version, the process needed a little twist with python and scrapy. If you add a new tool using this pattern, you can use the function bellow in your install-tool.sh and update-tool.sh files.
# example with pspy
# this is not a full script, only a function. Sould be part of an install or/and update script.
# function that use some-scrapper.py
function specialTool() {
  urlGit="https://github.com"
  ## You should modify urlTool variable (Should be the only modification)
  urlTool="DominicBreuker/pspy/releases/latest"

  # scrapy command
  scrapy runspider $SOME_ROOT/some-scrapper.py -a start_url="$urlGit/$urlTool" -o output.csv >/dev/null 2>&1
  # Preparing txt file before downloading
  mv output.csv output.txt
  sort output.txt | uniq -d | tee output2.txt >/dev/null 2>&1
  rm output.txt
  sed -i -e 's#^#'"$urlGit"'#' output2.txt

  # Downloading each line with wget
  while IFS= read -r line; do
    wget $(echo "$line" | tr -d '\r') #> /dev/null 2>&1
  done <output2.txt

  # Cleaning up
  rm output2.txt
  rm output2.txt-e
}

specialToolinfo:
- Show the README.md file of an installed tool.
- Instead of using tool name, you can use is ID number showed when you do
./sometools.sh list. - Bat or cat ?
- I love using bat instead of cat, so when
infoaction is used, some-tools will try to detect thebatbinary. If it does it will ask you betweenbatorcat. - If you don’t know what I’m takling about, don’t worry
catwill be use by default without asking if nobatdetected.
$ ./sometools.sh info LinEnum
# example using an ID number
$ ./sometools.sh info 7complete-uninstall:
- Delete all installed tools, remove bin directory and delete our modification in
.zshrcor.bashrc. - We will delete only some-tools section in your
.zshrcor.bashrcfile. So if you made some modifications along the way, they will be kept. - Af the complete uninstall, you should have 3
.zshrcor.bashrcfile. One finishing with.backupthat we created at the initial setup and the second one,.backup2, before deleting sometools section in the complete-uninstall process.
$ ./sometools.sh complete-uninstall
Vagrantfile
Install Some-Tools within a brand new Kali 2020.x VM using Vagrant. This repo include a Vagrantfile of Kali-Linux 2020.x release, but you can see the original vagrant box here here. Providers for this box are: VMWare Fusion and Virtualbox.
I’m using VMware Fusion, so this Vagrantfile will be configure that way. You can modify vagrant box information to fit your need. If you are using Virtualbox, just swith the comments in the Vagrantfile.
How to use it ? (Complete install with brand new Kali VM in 5 commands):
# Download Vagrantfile from this repo
$ wget https://raw.githubusercontent.com/som3canadian/Some-Tools/master/Vagrantfile
# start the kali box
$ vagrant up
# connect ssh to the kali box
$ vagrant ssh
# cd into some-tools
$ cd Desktop/Some-Tools
# setup some-tools
$ ./sometools.sh setup
# Verify the installation by:
# 1. open new terminal tab or window
# 2. cd ~/Desktop/Some-Tools
# 3. ./sometools.sh list
Others
- When using the ID number instead of tool name, be sure to use the ID number from
./sometools.sh listand not./sometools.sh list-installed - If you add a new tool that needs specific update instructions, you can create the file
update-tool.shin the tool dir (like the install-tool.sh and uninstall-tool.sh file). When you will check-update, the some-tools.sh script will take it in consideration. - You can’t use the same name for two tools. It will cause problems. When using add-tool action, we will check for that. A solution for that would be to specify category name when using an action but I really don’t want that. Since using a different name is easy, I have no intention for the moment to develop a solution that will let us use the same name for multiple tools.
- Some of the tool you will install may ask you for
sudopermissions ! - The
check-git.shfile include in the repo is for the check-update and check-update-all actions. - I’m building this on my free time, may have some bugs. If stars start to grow, I may put more time and effort.

Some-Tools (this link opens in a new window) by som3canadian (this link opens in a new window)
Some Pentest Tools. Install and keep up to date some pentesting tools. I used this to pass my OSCP exam.